By bric-a-brac-montroyal February 18, 2026
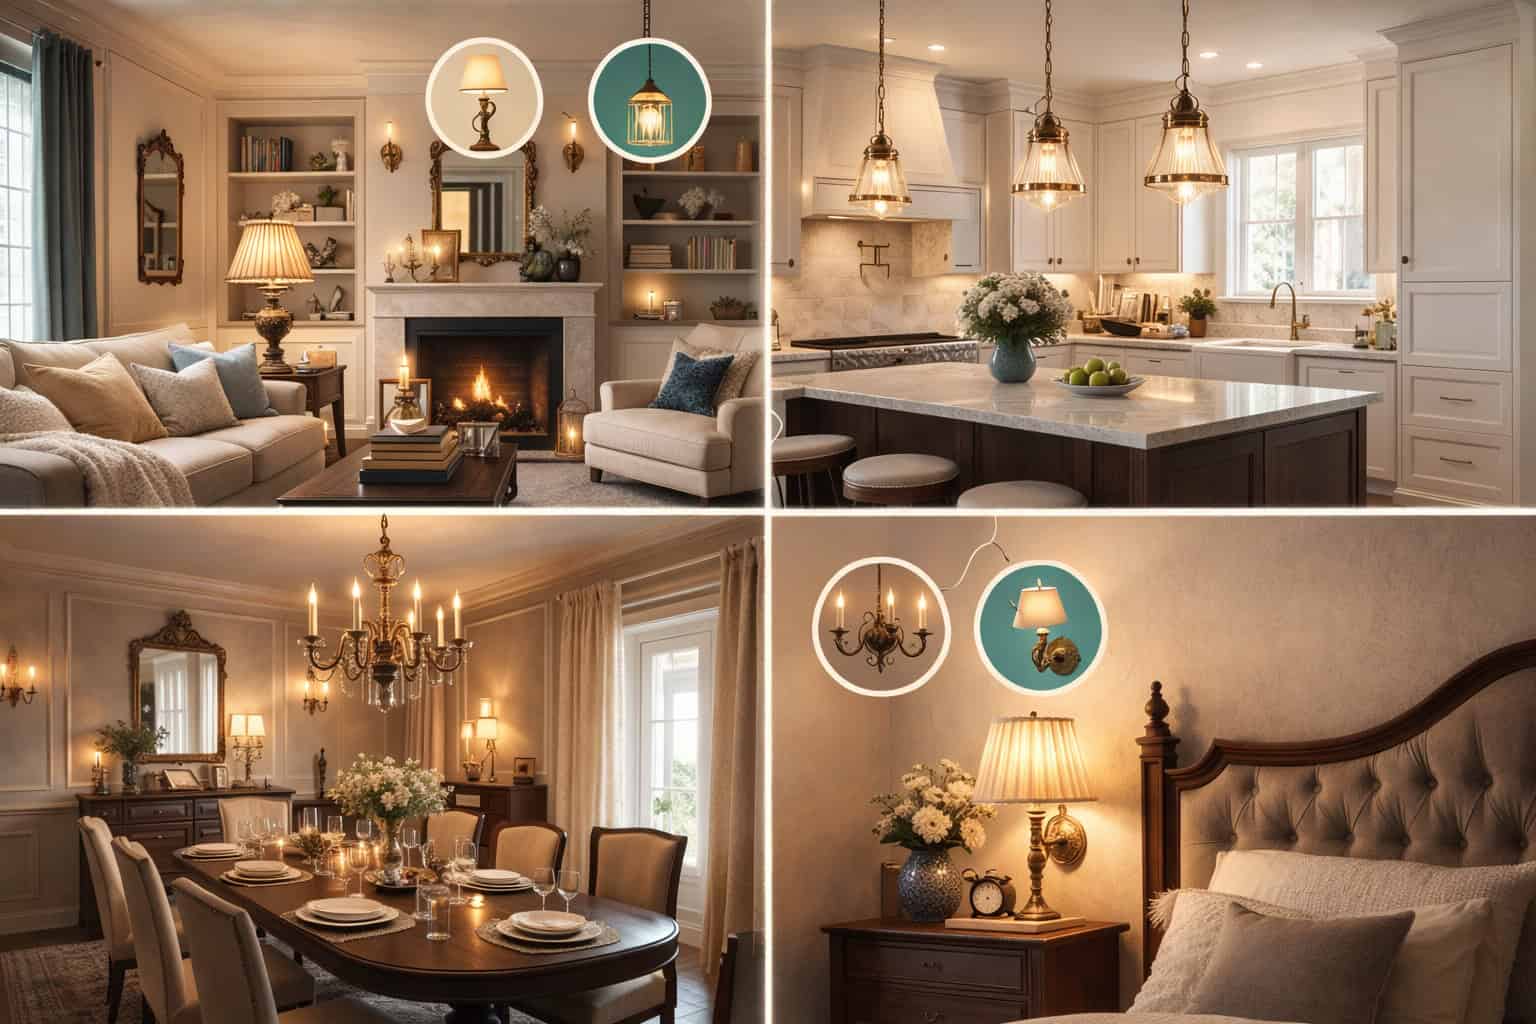
Mont-Royal homes and apartments have a particular kind of charm: architectural details that deserve warm light, rooms that sometimes feel compact, and ceiling heights that can vary from “airy” to “cozy.”
This complete guide to vintage lighting ideas for Mont-Royal interiors is designed to help you create a space that feels inviting, functional, and era-appropriate—without overwhelming your rooms or your budget.
Whether you’re a renter looking for vintage lighting for Mont-Royal apartments (hello, plug-in solutions and smart dimmers) or a homeowner investing in rewired heritage pieces, the goal is the same: light that flatters your space and works for real life.
You’ll find Mont-Royal vintage lighting design ideas for every room, plus antique lighting ideas for Montreal interiors that balance beauty with practical considerations like glare, brightness, and safe installation. If you love the look of heritage-style lighting for Mont-Royal spaces, you’re in the right place.
Along the way, you’ll learn how to choose an era (Art Deco, mid-century modern, Industrial, Parisian/heritage, Victorian-inspired), build a layered lighting plan (ambient, task, accent), shop smart, and avoid the most common mistakes that make vintage lighting feel dim, harsh, or cluttered.
What Vintage Lighting Really Means (And How to Choose the Right Era)
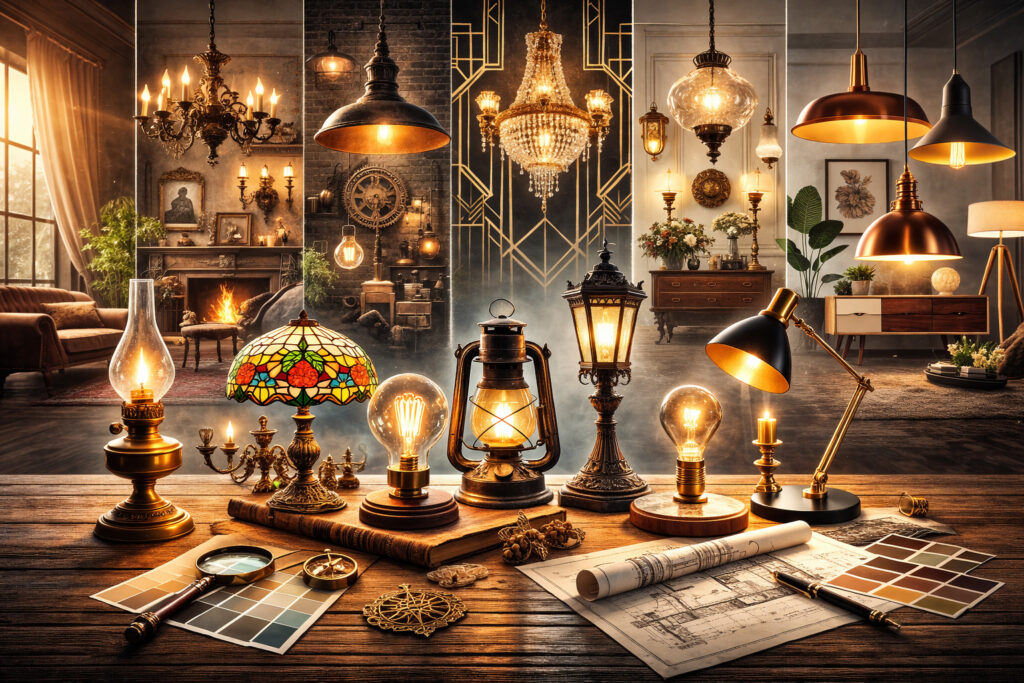
“Vintage” isn’t one single look—it’s a family of styles with distinct shapes, materials, and proportions. The key to getting vintage lighting right is choosing an era (or two) that matches your interior bones and your daily needs. Think of it like dressing your rooms: you want a consistent silhouette and a repeatable palette, with room for personality.
Art Deco: Glam Geometry With a Soft Edge
Art Deco lighting is recognizable for its symmetry, stepped details, and luxurious materials. Look for opal glass globes, ribbed or fluted shades, and metals like chrome or polished brass.
In a small room, Art Deco works best when the glass does the heavy lifting—white or opal shades diffuse light and keep things bright without feeling clinical.
Art Deco also plays well with darker walls and dramatic contrasts, but you don’t need to go full movie-set. One vintage pendant light with a globe shade or a pair of streamlined vintage sconces can give you the vibe without making the room feel themed. It’s especially effective in entries, hallways, and bathrooms, where you want impact in a tight footprint.
Mid-Century Modern: Clean Lines, Warm Materials
Mid-century modern lighting is all about sculptural simplicity: cone shades, globe clusters, and warm metals paired with wood or matte finishes. This era shines in living rooms and dining areas because it offers statement pieces that still feel light visually.
To keep mid-century pieces space-appropriate, pay attention to scale. A massive sputnik chandelier can overwhelm a smaller room, while a compact multi-globe fixture in opal glass feels airy and bright. Mid-century is also a great “bridge” style—it blends easily with vintage and contemporary furniture, which is ideal if your home is a mix.
Industrial: Practical, Durable, and Surprisingly Cozy
Industrial lighting comes from workshops and factories—think metal shades, exposed hardware, and utilitarian shapes. It’s perfect for kitchens, work corners, and dining spaces where you need focused task light.
To make Industrial feel warm (not stark), pair black enamel or aged metal with warm bulbs and softer surroundings: wood, textiles, and matte finishes. Industrial is also friendly to rentals because many reproductions come in plug-in and swag formats.
Parisian/Heritage: Timeless, Layered, and “Collected”
When people picture heritage-style lighting for Mont-Royal spaces, they’re often imagining Parisian-inspired interiors: schoolhouse lighting, antique brass, globe pendants, and delicate sconces that feel like they’ve always been there.
This style loves repetition—matching globes in a hallway, a consistent brass finish across a few rooms, or a signature glass shape repeated in different fixture types. It’s warm, romantic, and incredibly adaptable to smaller rooms because many heritage fixtures are compact.
Victorian-Inspired: Ornate Details With Modern Restraint
Victorian-inspired lighting can be beautiful, but it’s easy to overdo. The modern approach is restraint: one ornate piece with personality, balanced by simpler supporting lights.
Look for elements like scalloped shades, delicate arms, and antique finishes, but choose fixtures with good diffusion (opal or frosted glass) to keep the light flattering. Victorian-inspired pieces are gorgeous in bedrooms and dining rooms, where you can let the mood be softer and more atmospheric.
The Mont-Royal Interior Context: How to Work With Charm, Scale, and Light
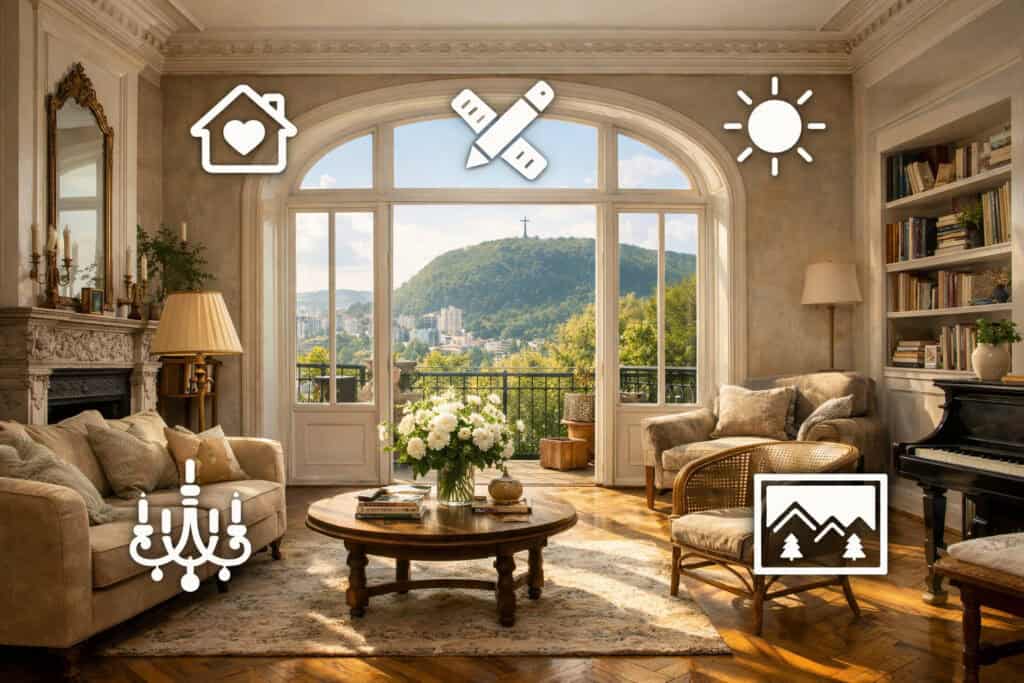
Mont-Royal interiors often feel “built-in” rather than blank: architectural trim, varied room proportions, and layouts that can change dramatically from one building to another.
Instead of assuming a single template, it helps to plan lighting around a few realities that show up frequently in established neighborhoods—especially if you’re comparing a bright corner unit to a more shaded layout.
First, room size and furnishing density matter more than you think. In smaller rooms, a single overhead fixture rarely makes the space feel good—it tends to create shadows in corners and makes walls look flatter. Vintage lighting works best when it’s layered, with a mix of ceiling, wall, and portable sources.
Second, ceiling heights vary, and that changes everything about fixture choice. Low ceilings call for semi-flush mounts, close-to-ceiling globes, and sconces that spread light horizontally.
Higher ceilings can handle pendants and chandeliers, but you’ll still want to control glare and brightness with shades that diffuse rather than expose the bulb.
Third, natural light differences (direction, window size, nearby buildings, tree cover) affect your bulb plan. A room with softer daylight may need slightly higher lumens and more layered sources to feel bright, while a sunlit room can lean into warmer bulbs without feeling dim.
Finally, many Mont-Royal interiors have details worth highlighting: molding, artwork, built-ins, vintage hardware. This is where accent lighting—picture lights, library lights, and discreet spot lighting—turns “nice” into “styled.”
The 3-Layer Lighting Method (Ambient, Task, Accent) Made Simple
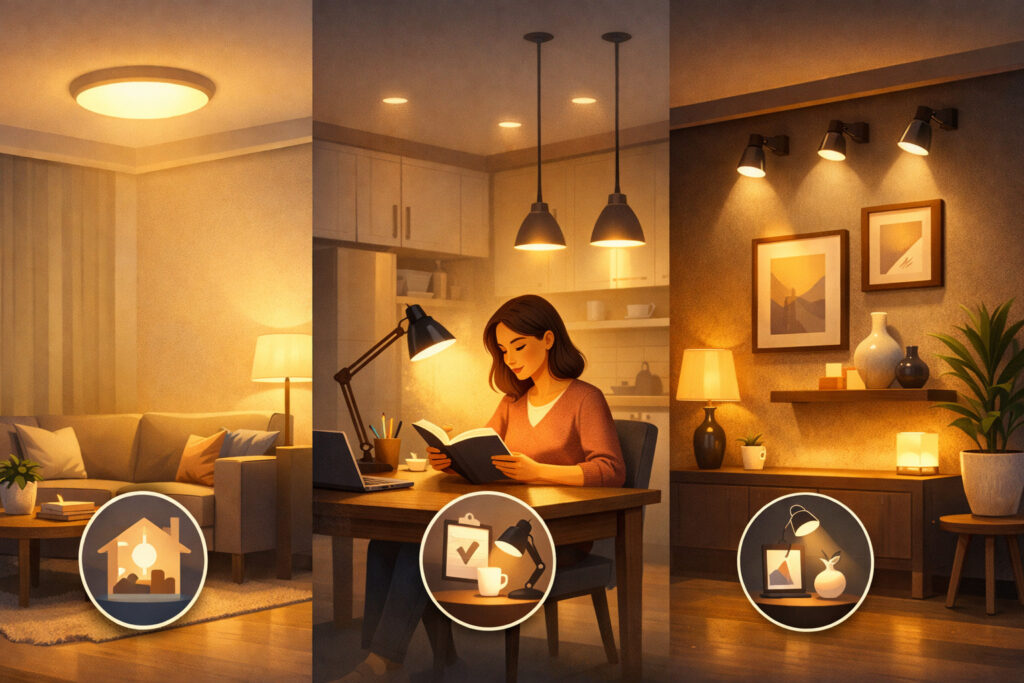
A great vintage lighting scheme isn’t about one perfect chandelier—it’s about balance. A layered lighting plan (ambient, task, accent) gives you control: bright when you need it, cozy when you don’t, and always flattering. The best part? This method works in any room size and makes vintage pieces feel intentional rather than random.
Ambient Lighting: Your Room’s Base Glow
Ambient light is the general “fill” that lets you move around comfortably. In vintage terms, this might be a schoolhouse lighting ceiling fixture, an opal globe pendant, a semi-flush mount, or a central chandelier. Ambient lighting should be diffused—especially in smaller rooms—so you don’t get harsh hotspots.
Aim for an even glow that doesn’t cast heavy shadows. Opal glass and fabric shades are your friends here. If your ambient fixture uses clear glass, plan to add more layers so the bulb glare isn’t doing all the work.
Task Lighting: Light Where You Actually Use It
Task lighting is focused, functional light for reading, cooking, grooming, and working. Think under-cabinet lighting, swing-arm vintage sconces, desk lamps, bedside lamps, or a pendant placed directly over a table or counter.
The common mistake is relying on ambient light for tasks. That leads to squinting and shadows—especially if the ceiling light is behind you. Task lights should be placed so they illuminate the surface without shining directly into your eyes.
Accent Lighting: The “Stylist” Layer
Accent lighting creates depth and mood. It highlights art, shelves, architectural details, and corners that would otherwise disappear at night. This includes picture lights and library lights, small lamps, LED candles, and wall washers.
In a vintage interior, accent lighting is what makes the room feel collected. A stained glass lamp in a reading corner, a picture light over a framed print, or a tiny library light clipped to a shelf can transform the atmosphere without adding clutter.
Room-by-Room Guide: Entryway Vintage Lighting (Welcome Without the Clutter)
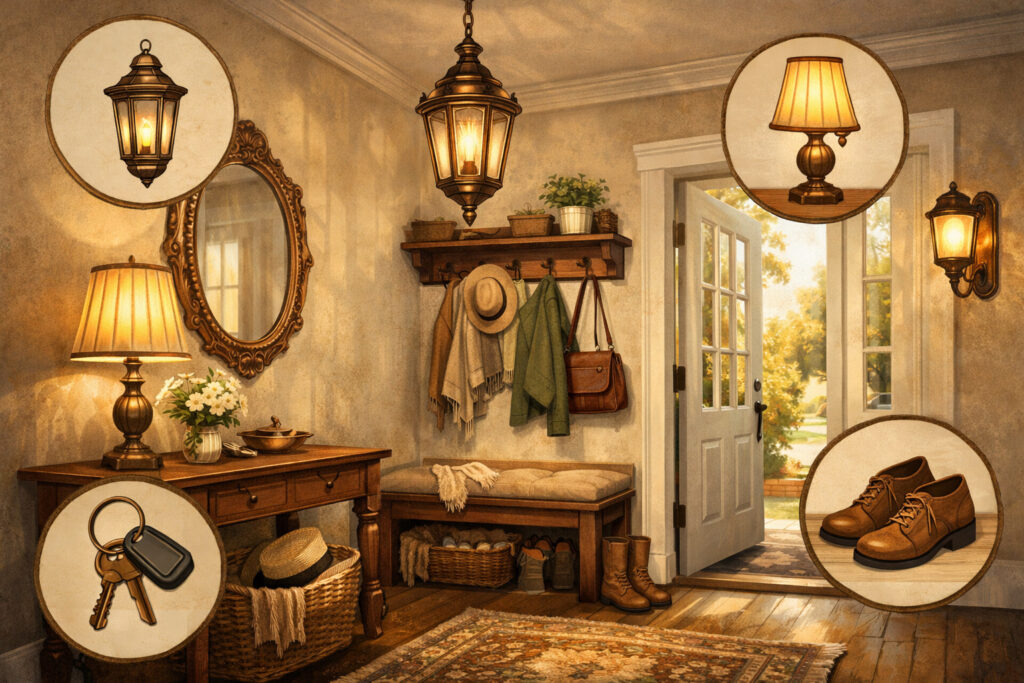
The entry is often small, transitional, and short on natural light—yet it sets the tone for your entire home. Vintage lighting works beautifully here because classic shapes feel intentional in tight spaces. Your goal: a warm welcome that also helps you find keys, check your look, and avoid shadows.
Best Fixture Types for Entries
If the ceiling height is modest, go for a semi-flush or close-to-ceiling globe—schoolhouse lighting is practically made for this. An opal glass globe with antique brass or black enamel hardware gives you soft, even light.
If you have a bit more height, a short pendant can be stunning, especially one with an opal globe or a small lantern form. Avoid long drops that crowd the space or sit at eye level when you’re putting on shoes.
For extra function, add wall lighting. Vintage sconces (or plug-in wall sconces (renter-friendly)) are perfect near a mirror or above a console. They also help balance overhead lighting so the entry feels calm rather than glaring.
Placement Rules That Make an Entry Feel Larger
Center the main ceiling fixture with the space you use, not just the room. If the entry opens into a hallway, place the fixture so it lights the path you walk. If you have a console, a sconce above or beside it adds a flattering layer and prevents the “cave corner” effect.
Keep bulbs warm and dimmable. Entries feel best when they glow, not blaze. A dimmer (including smart dimmers) lets you shift from bright morning routines to evening ambiance.
Room-by-Room Guide: Living Room Vintage Lighting (Cozy, Flexible, and Layered)
The living room is the ultimate multi-use zone: relaxing, reading, hosting, watching, working. Vintage lighting shines here because it brings character—especially when you mix eras thoughtfully and build layers at different heights.
Core Vintage Fixtures That Always Work
Start with a gentle ambient fixture. For smaller living rooms, a semi-flush mount with opal glass globes keeps the ceiling clean while giving you good spread. If your room can handle a pendant, choose one with an opaque or opal shade to avoid bulb glare.
Then build task lighting. Table lamps and floor lamps are your best friends, especially mid-century modern lighting silhouettes like tapered shades or globe lamps. If you want wall lighting, look for swing-arm or pharmacy-style sconces—many come as plug-in versions that renters can use.
Accent lighting completes the scene. Use picture lights and library lights to highlight artwork, shelves, or a bookcase. A stained glass lamp can add color and warmth without needing much brightness.
Living Room Placement That Feels “Designed”
Aim for at least three light sources visible from your main seating spot. Place one lamp near the sofa for reading, one lamp in an opposite corner to balance the room, and one accent light on a shelf or art piece. This prevents the “single overhead spotlight” feeling.
Watch your glare. If your main fixture exposes bulbs, make sure seating isn’t directly under it. Use shades, dimmers, and warmer bulbs to soften the effect.
Room-by-Room Guide: Dining Room Vintage Lighting (Statement Without Overwhelm)
Dining rooms love a focal point, and vintage lighting delivers. The trick is picking a fixture that fits the table and the room scale—then supporting it with subtle layers so it feels warm, not theatrical.
Vintage Dining Fixture Ideas by Style
For a heritage look, try a classic pendant with an opal globe or a schoolhouse shade. Antique brass light fixtures feel especially authentic here, and they pair nicely with wood tables and traditional chairs.
For Art Deco lighting, go for symmetry: a streamlined chandelier with globe shades, or a geometric pendant with frosted glass panels. Deco is perfect if your dining space connects to a more dramatic entry or hallway.
For mid-century modern lighting, a compact multi-globe chandelier or cone-shade pendant works well. It reads sculptural but doesn’t feel fussy.
Industrial dining? Choose a metal shade pendant (or a row of smaller pendants if the table is long). Just keep the rest of the room softer—textiles, warm bulbs, and maybe a lamp on a sideboard.
Placement and Proportion Rules
Hang pendants so the bottom of the fixture sits comfortably above the table—high enough for conversation sightlines, low enough to feel intimate. If your ceiling is lower, choose a wider fixture with a shorter drop rather than a tall, narrow pendant.
Support the dining light with a sideboard lamp, a pair of wall sconces, or a picture light over art. This keeps the room flattering and prevents harsh shadows on faces.
Room-by-Room Guide: Kitchen Vintage Lighting (Task-First, Still Beautiful)
Kitchens are where vintage lighting can go wrong if you prioritize style over function. The best kitchen lighting plan uses vintage fixtures for character and modern technique for usability: focused task light, layered ambient, and controlled glare.
Best Vintage Fixture Types for Kitchens
Overhead ambient: semi-flush schoolhouse lighting or a close-to-ceiling globe fixture works well for general brightness. If you have an island or peninsula, add vintage pendant lights with opaque or enamel shades to direct light downward.
Task lighting: under-cabinet lighting is essential (even if it’s a discreet modern strip). You can still keep the vintage vibe with visible fixtures at the sink or over counters—like small industrial pendants or classic opal shades.
Accent lighting: a small lamp on an open shelf, a library light over a cookbook nook, or a picture light above a framed print can soften the kitchen at night.
Placement Tips for a Kitchen That Feels Bigger
Avoid placing pendants where they block sightlines or collide with cabinet doors. Choose smaller pendants in multiples rather than one oversized fixture if the space is narrow.
In compact kitchens, prioritize brightness but keep it warm. Harsh cool light makes finishes look flat. Use a warm white bulb temperature (Kelvin) that still feels clean—especially if you cook often.
Room-by-Room Guide: Bedroom Vintage Lighting (Soft, Flattering, and Practical)
Bedrooms need gentleness, but they also need function—especially if you read, work, or get ready in the room. Vintage lighting is perfect here because it’s naturally mood-forward. The secret is balancing softness with enough usable light.
Vintage Bedroom Fixtures That Create Calm
Ambient: a semi-flush opal globe, a fabric-shaded pendant, or a small chandelier with diffused shades. If the ceiling is low, avoid deep fixtures that hang into the room.
Task: bedside lighting is where style meets real life. You can do matching lamps, or you can use vintage sconces—even better if they’re swing-arm or adjustable. Renters can use plug-in versions and route cords neatly with paint-safe clips.
Accent: one small light in a corner (like a stained glass lamp or a tiny lamp on a dresser) adds depth. A picture light over art creates a hotel-like feel with minimal effort.
Placement for Comfort and Function
For bedside sconces, place them so the light hits the book, not your eyes. Adjustable arms are ideal. If using lamps, choose shades that diffuse rather than spotlight—especially if you’re sensitive to bright light at night.
Use dimmers or smart controls so you can shift from bright “get ready” light to soft evening glow. Bedrooms benefit more than almost any room from gradual dimming.
Room-by-Room Guide: Bathroom Vintage Lighting (Heritage Charm, Modern Function)
Bathrooms are small but demanding. You need flattering, shadow-reducing light for grooming, plus safe fixtures and finishes that handle moisture. Vintage bathroom lighting can be stunning—especially Art Deco and heritage styles—but the details matter.
Best Vintage Looks for Bathrooms
Art Deco is a natural fit: globe sconces, ribbed glass, and symmetrical placement around a mirror. Heritage-style bathrooms also look beautiful with antique brass light fixtures and opal shades—just choose finishes that are designed for bathroom use.
Avoid bare bulbs or clear glass right at eye level. Bathrooms amplify glare. Frosted or opal glass is the best choice for comfort and flattering skin tones.
Placement Rules for Flattering Light
The most flattering setup is two sconces flanking the mirror at eye level. This reduces shadows under the eyes and chin. If that’s not possible, a well-diffused fixture above the mirror can work, but it may cast more downward shadows.
Add a ceiling fixture for ambient fill—especially if your vanity light is the only source. If the bathroom is very small, choose a compact flush mount with opal glass.
Room-by-Room Guide: Hallways Vintage Lighting (Rhythm, Repetition, and Glow)
Hallways are often overlooked, but they’re the connective tissue of your home. Vintage lighting can turn a hallway from “pass-through” to “gallery”—especially when you use repetition and warm diffusion.
Fixtures That Make Hallways Feel Intentional
If you have a long hallway, repeating schoolhouse lighting or opal globe flush mounts creates rhythm and even brightness. For a narrower space, wall sconces can be better than ceiling fixtures because they widen the feel visually.
Picture lights and library lights are hallway heroes. They let you highlight framed art, photos, or a small bookshelf, giving the space personality without taking up floor space.
Placement Tips for Long, Narrow Spaces
Space ceiling fixtures evenly so there are no dark gaps. If using sconces, align them at consistent heights and keep shades diffused to avoid harsh glare on walls.
In small apartment lighting ideas, hallways benefit from motion-sensing smart bulbs or schedules—soft light when you walk through, brighter when you need it. Just keep the color temperature warm so the hallway feels like part of your home, not a corridor.
Renter-Friendly Vintage Lighting for Mont-Royal Apartments (No Hardwiring Needed)
If you rent, you can still create a full vintage lighting story—without permanent changes. The key is choosing pieces that plug in, hang safely, and add layers at different heights. This is where vintage lighting for Mont-Royal apartments really shines: you can get the look with smart placement and a few renter-safe tools.
Plug-In Wall Sconces and Swag Pendants
Plug-in wall sconces (renter-friendly) are a game changer. Look for swing-arm styles for bedside reading, globe sconces for hallways, or shaded sconces for living rooms. Route cords neatly using paint-safe clips, and hide extra length behind furniture.
Swag pendants let you create the feel of a ceiling pendant without rewiring. Choose a vintage-inspired pendant with an opal shade, rattan shade, or enamel shade depending on your style. Use a ceiling hook rated for the fixture’s weight, and follow safe installation guidelines—if you’re unsure about your ceiling material, choose lighter fixtures.
Battery Picture Lights, Adhesive Hooks, and Portable Layers
Battery picture lights add instant mood and make hallways or living rooms feel styled. They’re also perfect for highlighting art without adding clutter.
Adhesive ceiling hooks can work for very lightweight elements, but don’t use them for heavy fixtures or anything that could fall. When in doubt, keep it light and use floor and table lamps to build your layers safely.
Smart Dimmers Without Rewiring
If you can’t install a wall dimmer, use smart bulbs or plug-in dimmers for lamps. Many smart systems let you schedule lighting scenes—bright mornings, cozy evenings—without changing any wiring.
Bulbs, Brightness, and Mood: Simple Lumens + Kelvin Guidance
Vintage lighting looks best when the bulb choice supports the fixture. The wrong bulb can make an antique brass fixture feel brassy and harsh, or make opal glass look dull. Use this section as your practical cheat sheet for brightness, warmth, and comfort.
Warm Glow vs Neutral: What to Choose
For vintage interiors, warm light is usually the most flattering. Look for a warm white bulb temperature (Kelvin) that keeps the room cozy and makes heritage finishes feel rich.
- Cozy, vintage-forward glow: 2200K–2700K
- Warm but slightly cleaner for kitchens/baths: 2700K–3000K
- Neutral (use sparingly in vintage spaces): 3000K–3500K
If a room feels gloomy, don’t jump to cooler bulbs first. Increase lumens and add layers before changing temperature. Cool light can make vintage details feel less inviting.
Simple Brightness Ranges by Room (Lumens)
These are flexible ranges, because room size and natural light vary. Use them as a starting point:
- Entry/hallway ambient: 800–1600 lumens total
- Living room ambient: 1500–3000 lumens total, plus lamps
- Dining ambient (dimmable): 1500–2500 lumens total
- Kitchen task areas: 2000–4000 lumens total, with focused task lighting
- Bedroom ambient: 1000–2000 lumens total, plus bedside task
- Bathroom (vanity + ambient): 2000–4000 lumens total, with diffused shades
Dimmers and Smart Controls
Dimming is the secret weapon for vintage lighting. It lets you keep enough brightness available while dialing down the mood. Smart dimmers are excellent when you want scenes: “Evening,” “Movie,” “Clean,” “Morning.”
If you’re using dimmers, choose bulbs labeled dimmable and test for flicker. If flicker happens, try a different bulb brand or a compatible dimmer type.
Finishes and Materials That Look Authentic (Without Feeling Dated)
Vintage lighting feels convincing when materials look right. The finish doesn’t have to be old—it just needs to look believable in the context of your rooms. The best approach is to pick a primary metal and a supporting metal, then repeat them across fixtures.
Metals That Read “Heritage”
- Antique brass light fixtures: warm, classic, forgiving in different light
- Aged bronze: deeper, moodier, great with warm bulbs
- Black enamel: crisp, timeless, pairs well with opal glass
- Chrome: perfect for Art Deco and clean vintage looks
Avoid mixing too many shiny finishes in small rooms. If you love variety, keep sheen consistent—either mostly matte/aged or mostly polished.
Glass and Shade Materials That Feel True to Era
- Opal glass globes: the most versatile and flattering diffuser
- Ribbed or fluted glass: adds texture, great for Deco-inspired looks
- Stained glass lamps: best as accent pieces, not your only light source
- Rattan shades: warm, relaxed, vintage-adjacent with softness
Bulbs as Part of the “Material Story”
Edison-style bulbs (warm glow use) can look beautiful in the right fixture, but they’re not always the best daily light. They tend to be lower-lumen and can create glare if exposed. Use them where you want atmosphere—entry pendants, accent sconces—not as your only kitchen or bathroom bulb.
Sourcing and Shopping Guide: Vintage, Thrifted, and “Vintage-Inspired” Done Right
Finding the right pieces is part treasure hunt, part quality control. The goal is to choose fixtures that look great and function safely. Whether you’re browsing vintage shops, looking at thrifted lighting finds, or buying reproductions online, a clear checklist will save you money and frustration.
Where to Look and How to Shop Smart
Vintage shops and curated sellers can be more expensive, but they often offer better condition and clearer provenance. Thrift and marketplace finds can be amazing deals—especially for lamps and smaller fixtures—but require more inspection.
Online marketplaces are excellent for specific styles: Art Deco globes, mid-century lamp bases, schoolhouse shades, and antique brass sconces. Use detailed searches and save your favorite keywords (opal globe, ribbed glass, schoolhouse, pharmacy sconce).
What to Inspect Before You Buy
Look closely at:
- Wiring condition (cracked insulation, brittle cords, loose sockets)
- Shade integrity (chips, hairline cracks, wobble)
- Hardware stability (tight joints, secure canopy parts)
- Signs of overheating (scorch marks near sockets)
Be cautious of fixtures that look “refinished” poorly—uneven spray paint, sticky residue, or missing grounding components. Lamps are often easier than ceiling fixtures because you can replace a cord more simply, but you still want quality parts.
Vetting Vintage-Inspired Reproductions
Not all reproductions are equal. The best ones use heavier metals, proper diffusers, and quality sockets. Look for:
- A believable scale (not too tiny or cartoonishly oversized)
- Good diffusion (opal glass, thick glass, fabric shades)
- Sturdy mounting hardware
- Certified fixtures and components for peace of mind
Safety and Installation Basics: Certified Fixtures, Rewiring, and When to Hire Help
Vintage lighting should feel romantic—never risky. If you’re bringing older pieces into your home, treat safety as part of the design. The good news: you can absolutely enjoy vintage lighting while keeping things practical and secure.
Certified Fixtures and Safe Modifications
Whenever possible, choose certified fixtures and components. If you’re buying a reproduction, look for clear product info about certification and compatible bulbs. For older pieces, assume you may need updates to meet modern expectations.
Avoid DIY modifications that change how a fixture handles heat, grounding, or wiring routes. Small cosmetic changes (like swapping a shade, adding a diffuser, or changing a chain length) can be fine when done properly. Electrical changes are where you want professional guidance.
Rewiring Vintage Lamps Safely
Rewiring vintage lamps safely is often worth it—especially if you find a beautiful base with questionable wiring. Warning signs include brittle cords, loose sockets, flickering, or heat near the socket.
A qualified professional can replace cords, sockets, and internal wiring properly. This is especially important for metal fixtures where grounding and insulation matter. If you’re not experienced, don’t attempt complex rewiring yourself.
When to Hire an Electrician
Hire help when:
- You’re installing ceiling fixtures and unsure about the box or support
- The fixture is heavy or requires structural anchoring
- You want a wall dimmer installed properly
- You’re mixing old fixtures with new wiring
- You see heat damage or smell burning
Common Mistakes to Avoid (So Vintage Lighting Feels Warm, Not Weird)
Even beautiful fixtures can fall flat if the plan is off. These are the mistakes that most often make vintage lighting feel uncomfortable or cluttered—especially in smaller rooms.
Mistake 1: Bulbs That Are Too Cool
Cool light can make vintage metals look sterile and can flatten cozy textures. If your room feels “off,” switch to a warmer Kelvin range before buying new fixtures.
Mistake 2: Wrong Scale for the Room
Oversized fixtures can overwhelm smaller rooms; tiny fixtures can look lost and under-light the space. Match the fixture to the room and the furniture beneath it. Dining lights should relate to the table; living room fixtures should relate to the seating area.
Mistake 3: Glare and Exposed Bulbs Everywhere
Clear glass plus bright bulbs can create harshness. Use diffusers (opal glass, frosted bulbs, fabric shades) and keep bare bulbs out of direct sightlines.
Mistake 4: One Overhead Light Only
A single ceiling fixture creates shadows and makes rooms feel flat. Build a layered plan with lamps, sconces, and accents.
Mistake 5: Cluttered Fixtures and Too Many Styles
Mixing eras is fun, but keep a thread consistent: repeated metal finish, repeated globe shape, or repeated shade material. Too many statement pieces compete and make the room feel busy.
10 Ready-to-Copy Vintage Lighting “Recipes” (Fixtures + Bulb Temp + Placement)
These are simple, repeatable lighting setups you can copy exactly. Each one uses the layered method and keeps scale in mind.
1) Opal Globe Heritage Hallway
- Fixtures: repeat schoolhouse lighting flush mounts (opal glass) + one picture light over a key artwork
- Bulbs: 2700K warm white
- Placement: ceiling fixtures evenly spaced; picture light centered above frame
- Notes: perfect for narrow halls; soft and architectural
2) Art Deco Entry Glow
- Fixtures: Art Deco opal globe semi-flush + pair of slim vintage sconces by a mirror
- Bulbs: 2700K (dimmable)
- Placement: ceiling centered on walking path; sconces at face-height for flattering light
- Notes: symmetry makes the entry feel intentional
3) Mid-Century Living Room Layers
- Fixtures: compact multi-globe ceiling fixture (opal) + cone-shade floor lamp + library light on shelf
- Bulbs: 2700K throughout
- Placement: floor lamp beside sofa; library light aimed at books/art
- Notes: sculptural but cozy, great for mixed furniture
4) Parisian Corner Reading Nook
- Fixtures: plug-in swing-arm sconce + small side table lamp with fabric shade
- Bulbs: 2200K–2700K for extra warmth
- Placement: sconce slightly above shoulder height; lamp at elbow height
- Notes: renter-friendly and ultra cozy
5) Industrial Kitchen Workhorse
- Fixtures: enamel vintage pendant lights over counter + discreet under-cabinet task lighting
- Bulbs: 2700K–3000K depending on preference
- Placement: pendants aligned with work zones, not centered in the room
- Notes: focused task light without harsh overhead glare
6) Heritage Dining Room Candlelight
- Fixtures: antique brass pendant with opal shade + sideboard lamp
- Bulbs: 2700K and dimmer on pendant
- Placement: pendant centered over table; lamp on sideboard for background glow
- Notes: flattering light for faces; flexible for hosting
7) Bedroom Soft Hotel Glow
- Fixtures: semi-flush opal globe + matching plug-in bedside sconces
- Bulbs: 2200K–2700K
- Placement: sconces positioned for reading angle; ceiling light dimmed low at night
- Notes: layered comfort without relying on overhead
8) Bathroom Deco Balance
- Fixtures: two globe sconces flanking mirror + small opal ceiling fixture
- Bulbs: 2700K–3000K (dimmable where possible)
- Placement: sconces at eye height; ceiling centered
- Notes: reduces shadows, keeps it flattering
9) Small Apartment “No Overhead Needed” Living Room
- Fixtures: two table lamps + one floor lamp + battery picture light
- Bulbs: 2700K
- Placement: lamps in opposite corners; floor lamp near seating; picture light over art
- Notes: perfect when the ceiling fixture is untouchable
10) Stained Glass Accent Moment
- Fixtures: stained glass lamp as accent + simple opal ambient fixture
- Bulbs: 2700K ambient; low-lumen warm bulb in stained glass lamp
- Placement: stained glass lamp on a side table away from TV glare
- Notes: color and mood without sacrificing overall brightness
FAQs
Q1) What bulb color makes vintage lighting look best?
Answer: In most cases, warm light flatters vintage finishes and makes spaces feel inviting. Aim for a warm white Kelvin range that supports your materials—especially antique brass, aged bronze, and opal glass.
If your room gets limited daylight, increase lumens and add layers before switching to cooler bulbs. Warmer bulbs also reduce the “clinical” feel that can make heritage-style lighting look less authentic.
Q2) How do I add vintage sconces in a rental?
Answer: Use plug-in wall sconces (renter-friendly) and mount them according to the hardware instructions for your wall type. Keep cord management tidy with paint-safe clips and route cords behind furniture.
If drilling isn’t allowed, prioritize very lightweight sconces and use approved hanging methods—but avoid relying on adhesive solutions for anything heavy or heat-producing. Pair plug-in sconces with smart bulbs or plug-in dimmers for flexibility.
Q3) Are Edison bulbs a good idea for daily lighting?
Answer: They can be, but not always as your primary light source. Edison-style bulbs (warm glow use) often look best for mood lighting rather than high-output task lighting. They can also cause glare if exposed. If you love the look, choose versions with better diffusion or place them inside shades or frosted glass so you get the vibe without the harshness.
Q4) How do I know if a vintage lamp is safe?
Answer: Start with a visual inspection: check the cord for cracking, look for loose sockets, and watch for wobble or signs of heat damage. If the lamp flickers or feels hot near the socket, stop using it.
Consider professional rewiring for older lamps—rewiring vintage lamps safely is often a smart upgrade so you can enjoy the piece daily. When buying new or reproduction pieces, prioritize certified fixtures and components.
Q5) What lighting works best in small bedrooms?
Answer: Small bedrooms benefit from gentle ambient light plus dedicated bedside task lighting. A semi-flush opal globe keeps the ceiling visually quiet while providing a soft glow.
Add bedside sconces or lamps for reading so you don’t rely on overhead light. Keep bulbs warm, use dimming, and add one accent light on a dresser or shelf for depth.
Q6) Can I mix Art Deco and mid-century lighting?
Answer: Yes—if you use a common thread. Repeat a finish (like brass or chrome), or repeat a glass type (like opal globes) across both styles. Keep silhouettes compatible: streamlined Deco pieces pair well with clean mid-century shapes.
Avoid mixing too many ornate elements at once, and use simpler supporting lights so your main pieces don’t compete.
Q7) How many lumens do I need for a living room?
Answer: A flexible target is around 1500–3000 lumens total for ambient, then add lamps for task and mood. The exact number depends on room size, wall color, and natural light. Instead of chasing one bright ceiling fixture, use a layered plan with at least two lamps and an accent light. This prevents harsh shadows and makes the room feel richer at night.
Q8) What’s the best vintage lighting for low ceilings?
Answer: Choose semi-flush or flush mounts with diffused shades—schoolhouse lighting and opal globe fixtures are excellent. Avoid long pendants and deep chandeliers that steal headroom.
If you want a statement, use a close-to-ceiling fixture with interesting hardware or a beautiful glass shape. Add sconces and lamps to create layers without dropping the ceiling visually.
Q9) How do I create a cozy layered lighting plan?
Answer: Use the three layers: ambient (soft ceiling fixture), task (reading/cooking/grooming lights), and accent (art and corner glow). Place lights at different heights—ceiling, eye level, table level—so the room feels dimensional.
Keep bulbs warm, add dimming, and avoid relying on a single overhead light. Even one extra lamp can make a big difference.
Q10) What finishes look the most “heritage” without looking dated?
Answer: Antique brass, aged bronze, black enamel, and opal glass are timeless choices. Chrome can also feel heritage when paired with Art Deco shapes and frosted glass. To avoid a dated look, keep the finish palette limited and prioritize good diffusion. The fixture should feel integrated, not like a costume piece.
Q11) How do I avoid harsh lighting in small rooms?
Answer: Harshness usually comes from glare and lack of diffusion. Use opal/frosted glass or fabric shades, choose warm bulbs, and add layers so one fixture isn’t doing all the work. Place task lights so they illuminate surfaces without shining into your eyes. Dimmers help you fine-tune brightness to the room’s size.
Q12) What are easy small apartment lighting ideas that look vintage?
Answer: Start with portable layers: a pair of thrifted lamps, a floor lamp near seating, and a battery picture light over art. Add plug-in sconces for eye-level glow. If you want a pendant look, use a swag pendant with a lightweight vintage-inspired shade. Keep finishes consistent (antique brass + opal glass is an easy win).
Q13) Should I use matching fixtures in every room?
Answer: Not necessarily. Matching can look too uniform, but repeating elements creates harmony. Repeat one finish or one glass style across multiple rooms, then vary the fixture type. For example: opal globes in the hallway, opal pendant in the kitchen, opal sconces in the bathroom—cohesive, not identical.
Q14) What’s the safest way to use thrifted lighting finds?
Answer: Inspect carefully, and assume older wiring may need attention. Don’t use damaged cords or loose sockets. For ceiling fixtures or anything questionable, consult a professional. Choose certified fixtures for new purchases and avoid DIY electrical modifications unless you’re qualified. Safety upgrades are part of making vintage work for modern life.
Conclusion
The best vintage lighting ideas for Mont-Royal interiors aren’t about filling every corner with antiques—they’re about choosing an era that suits your home, building a layered lighting plan, and selecting fixtures that flatter your room size and ceiling height.
When you combine opal glass diffusion, warm Kelvin bulbs, thoughtful placement, and a mix of ambient/task/accent layers, vintage lighting stops being “decor” and becomes atmosphere.
Whether you’re exploring Mont-Royal vintage lighting design ideas for a full refresh or starting small with vintage lighting for Mont-Royal apartments, you can create a space that feels collected, cozy, and practical—without harsh glare or dim corners.
And if you’re inspired by antique lighting ideas for Montreal interiors and want that heritage glow, remember: repetition of finishes and glass types is your shortcut to cohesion.